
Hello, my dears
Today I would like to sew the summery shirt blouse “Estelle” with embroidery from BERNINA’s Inspiration Magazine with you.
The loosely cut shirt blouse “Estelle” is not at all difficult to sew and the embroidery gives it a little extra flair. Since the embroidery is placed on the shirt pocket, this motif is also an excellent opportunity for beginners to familiarize themselves with their new machine.


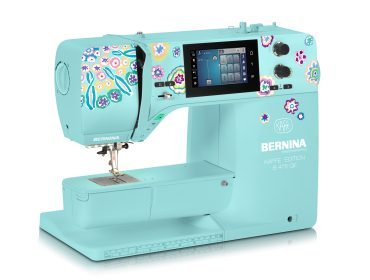
The BERNINA 700 was only recently allowed to move in with me and since then I’ve been practicing and trying it out. My first embroidery project was the cool zebra embroidery for the “Estelle” blouse.

I used the BERNINA 475 QE Kaffe Edition and the BERNINA L 860 to sew the blouse.

Sew the “Estelle” blouse – let’s get started
Material for the blouse “Estelle”
First you need the pattern for the blouse “Estelle”. This can be found in the current issue (02/2023): Inspiration Magazin issue 02/2023
To sew the blouse you need a suitable fabric. Various blouse fabrics are possible, preferably with a nice drape. I chose a linen-viscose blend.
You also need:
- Buttons (9-12mm in size, depending on taste)
- Fleece line G710 to reinforce your collar (I left this out on this shirt for a more casual case)

Material zebra embroidery
For the embroidery you need the motif for your embroidery machine, the link to this can be found in the magazine.
You will also need embroidery stabilizer from Vliesline and, last but not least, two embroidery threads in the colors of your choice. I used Mettler Polysheen yarn for this.
Breast pocket with zebra embroidery
After you have cut the blouse, prepare the breast pocket with embroidery. For this you clamp a sufficiently large piece of fabric (this should be about 20x20cm) in your embroidery frame. Stick stabilizer to the back of the leftover fabric using spray adhesive. I like to use Mettler’s Web Bond Ta glue when sewing. This lies on the material (in this case the fleece) like a net and does not stick to your needle quite as quickly. In addition, it is not quite as fine and can therefore also be used well indoors.

You then load the embroidery file onto your embroidery machine via the USB interface. Place the motif and adjust the size if necessary. I left the zebra in its original size.
Then select your colors and equip the machine accordingly.
Just press start and off you go.

If necessary, remove the basting seam after embroidering and remove the excess embroidery stabilizer.
Then cut your bag – depending on the size 13×13 or 15x15cm. If you like, you can cut a second pocket for the other side as in the pattern without embroidery. I only chose one bag.
Finish the bag all around with your serger and hem the upper edge.

Step 2: Shoulder and side seams
Now sew the shoulder seams of the blouse. To do this, first mark the seam allowance with tailor’s chalk from about 4 cm in front of the corner to 4 m after the corner. Then pin the shoulder seams together and sew with the sewing machine exactly up to the corner of the marking you just made.

Also close the side seams, first with the sewing machine and then with the overlocker.
Step 3: Sew the collar of the “Estelle” shirt blouse
Lay the two front pieces right sides together so that the two short ends, which now form the center back of the collar, are on top of each other. Close the seam with your sewing machine.

The two facing parts are also sewn together in this way.

Now iron the edge of the receipt that will later be turned over (this is the outer edge) by 1cm to the left. This step is optional, but will make things a little easier later on.
Then pin the cut collar right sides together on the back piece. To do this, cut the seam allowance in the previously marked corner and fold the fabric neatly around the corner. Then you sew with the sewing machine exactly from corner to corner, where your shoulder seam ends.


Step 4: Sew on the facing
Now the facing of the shirt blouse “Estelle” can be sewn on. Place this on the shirt blouse right sides together and pin it in place. Then sew the slip on with your sewing machine. Think of the triangles that will later form the lapel. I drew them with chalk, sewed them and then cut them out.
If you want, you can also clean up with the overlocker.

Then iron the facing to the left and shape the front edge and the tips. If you like, you can topstitch the edge again all around with a tight edge.
Then you fold the seam allowance of the still open facing edge to the left and staple it. I decided to only sew the seam allowance on the facing so that later no seam is visible from the outside. The slip is automatically fixed by the buttons and buttonholes on the front.
The facing is fixed in the seam shadow on the back collar and on the shoulder seams.


Step 5: Sew sleeves
In this step, the sleeves of the shirt blouse “Estelle” are sewn. To do this, fold the sleeves together, right sides together, so that the two open edges are on top of each other. Now sew with the sewing machine and then neaten it again with the overlocker.

Then insert the sleeves into the blouse by pinning them to the appropriate armholes, right sides together. Then sew again with the sewing machine and finish with the overlocker.
Step 6: Sew the buttonholes and buttons on the “Estelle” shirt
Now it’s time for the buttonholes. Mark the position of the buttonholes with tailor’s chalk on the front part and determine the buttonhole length with your sewing machine. Your BERNINA offers the practical function for this, where you only have to hold the button on the display and turn the yellow circle to the size of the button.
Then sew the buttonholes with the automatic buttonhole.
 Cut open the buttonholes, transfer the position of the buttons to the other front piece and sew on the buttons with your sewing machine as well.

Step 7: Finishing the shirt blouse “Estelle”
Your shirt blouse “Estelle” is now almost finished. Only the hems and the shirt pocket with the cool embroidery are missing.
Fold the hem and sleeve hems twice to the left by 1cm so that the open edge is no longer visible. Then sew the seams with about 0.8 cm allowance.

Position the shirt pocket on your blouse and pin it. It is even better to fix the bag with some wonder tape. Then sew the shirt pocket close to the edge.
And the shirt blouse “Estelle” is ready. I wish you a lot of fun sewing.

Leave a Reply