

Hello, my dears
Today I want to help you sew a cool swimsuit with a zipper and long sleeves that is perfect for many different water sports. Especially when it comes to standup paddling, I often see swimsuits with sleeves that are somewhat reminiscent of a short wetsuit from surfing. I think this look is not only chic, but also practical, since you can easily get a sunburn on your shoulders. Whether for fashion or practical reasons – a self-sewn bathing outfit is always something great. And it’s not that difficult with the homemade bathing suits. So get to the sewing machine and let’s get started!


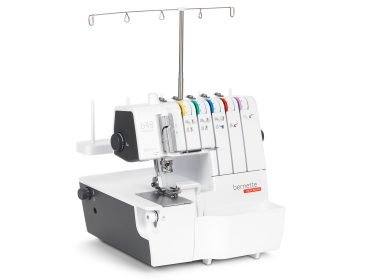
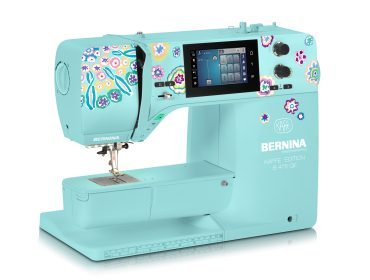
I used three different machines for this outfit. I sewed most of the seams with the BERNINA L 860. With the overlocker, the seams are very stretchy and stable, which is very helpful for tight-fitting garments such as swimwear. I sewed the zipper and the auxiliary seams with the BERNINA 475 QE Kaffe Edition and the hems for high elasticity with the coverstitch function of the bernette 48.

Sew a swimsuit with a zipper — let’s get started
sewing pattern
For this sewing project, I chose a pattern from one of my favorite sportswear patternmakers. The cut is called “Barefoot Swimsuit” and is from Greenstyle. You can find the pattern here: Barefoot Swimsuit PDF Pattern
The pattern is in English, but thanks to the many drawings in the instructions, it is easy to understand even with little knowledge of the language. I also describe important steps in this article in German. The pattern includes many different versions, with or without a zipper, high or low back neckline, sleeveless or with sleeves in different lengths, various leg cuts, … So you can easily put together your dream swimsuit.
material
In order to sew such a swimsuit, you definitely need fabric for swimwear. These can be found in many well-stocked sewing shops and are characterized by high stretchability (about 75% in both directions), as well as opaqueness and, in the best case, resistance to chlorine and salt water. I chose a fabric from my small online shop with a striking leopard print.
You also need fabric for the lining. There are special swimwear linings (e.g. at sewy.de) or you can simply use a single-colored swimwear fabric that is not noticeable under your outer fabric. I simply used a white swimwear fabric.
If you also choose the variant with a zipper, you will also need a zipper. This should at least correspond to the length on average. If in doubt, buy a zipper that is too long and then shorten it accordingly.
You also need:
- Leftover fleece line G710 or seam tape to stabilize the front part at the zipper location
- Sewing thread for your machines
- Needle for elastic fabrics, such as the Schmetz Black Super-Stretch needle
- Cloth clips/pins
- bath gum
- optional: wonder tape

Step 1: Cut
First, think about what you want your version to look like. I decided on the following characteristics of the pattern:
- zipper
- low back
- long sleeve
- high leg cut
Then cut the pieces accordingly. Refer to the size chart for size and adjust the parts as described in the instructions if necessary.
The seam allowance of 1cm is already included in the pattern.
Step 2: Sew in the zipper
To make your swimsuit super easy to put on (or just use the zipper as a nice detail), we sew in the zipper first. For this purpose, the front part is first reinforced in the middle. Using the template for the zipper, cut out the interfacing and iron it on. A little caution is required here, not all bathing fabrics can be ironed. Try out a leftover piece to see if you can iron the fabric and if so, at what level. If your fabric cannot be ironed, you can baste the fleece line. Leaving out the reinforcement is not necessarily recommended, as the fabric stretches a lot and the zipper may not lie evenly when sewn on.

Then mark the seam lines. Once the center line and then to the right and left of it each 1cm over the length that is drawn in the section.

Then sew with a straight stitch of stitch length 2.5 along the marking.

Now you cut the front part exactly in the middle, up to about 1cm before the lower end of the seam you just sewed. There you cut at a 45° angle right up to the corner, but without severing the seam!

Now, right sides together, pin one side of the zipper to one of the front edges. The first tooth or the stopper of the zip should start 1cm below the edge of the neckline so that it does not appear unfavorably later in the seam allowance.

Then, with the help of the zipper foot, sew the zipper on along the little teeth and end exactly at the lower auxiliary seam. Locks the beginning and end of the zipper well.
If your zipper is too long like mine in this example, you can simply let it protrude downwards and cut it off later.

Now repeat this process on the other side of the zipper.

Then fold the small triangle at the bottom end of your zipper strip onto the wrong side of the fabric so that there is a clean, rectangular finish from the right. Then sew the triangle with a short seam.

Step 3: Sew in the lining at the front
Now the lining of the bathing suit is sewn in with a zipper. First on the front. The lining is cut in the center front in the same way as the front part.
Then open the zipper and sew the lining to the edge of the zipper, right sides together on the front piece. This is a little easier if, after pinning, you turn the parts so that the previous seam is visible when sewing. Then you can sew along this line. The process is also repeated for the other open center front of the lining.

Step 4: Close shoulder seams
Now you can close the shoulder seams on the bathing suit. Lay the back and front pieces on top of each other at the shoulders, right sides together. Make sure that you really only pin the front part and not the lining.

Then close the seams with the overlocker and the super stretch stitch.

Now the back lining is sewn to the front lining, starting at the shoulder seams. Here, too, you should make sure that you really only connect the two lining parts together.
Step 7: Close the neckline
To finish the neckline on the zip-up swimsuit, simply pin the lining around the edge of the neckline, right sides together. Here you can see why it is important that the first tooth of the zipper is 1 cm below the front edge. Because now your seam starts right there and you don’t have any teeth in the seam allowance that would be unattractive on the neck.

Sew this seam with the overlocker as well. However, I first sewed the front 2-3cm with the sewing machine with exactly 1cm seam allowance, for an even cut-out at the front.
Step 6: Zippered side seams of swimsuit
The side seams are then closed. Again, the outer and lining parts are worked separately! First, lay the side seams of the outer parts on top of each other, right sides together, and close them with the super-stretch seam. Then repeat the same for the food.

Step 7: Sew on the sleeves
If you have also decided on sleeves, these are now sewn on.
First fold the sleeves together right sides together and sew the long edge with the overlocker.

Then pin the sleeves to the bathing suit according to the markings, right sides together, and sew again with the overlocker.

Step 8: Sew hems
Now only the hems of the zip-up swimsuit remain. You can help out a little with the leg cuts and first connect the outside to the lining with a basting seam. So nothing slips later. If you want, you can sew the bathing rubber directly into the leg openings for more stability in this step. I’ve found that my bathing suits stay in place without them and the bath rubber bothers me. But here the opinions differ greatly, it’s best to try out what works best for you.

Then fold over the leg openings by 1cm and sew them in place with the coverstitch. I used the wide 3-thread cover stitch.

Finally, the sleeve hems. Feel free to try the swimsuit on and pin the hems accordingly. Then sew it up again with the coverstitch machine.

Your swimsuit with a zipper and long sleeves is ready. I wish you a lot of fun sewing.
Unfortunately I can’t show you any “in-action” pictures, unfortunately the weather wasn’t in my favor on my days off and the pictures in the rain didn’t turn out particularly well. So I hope that you can easily recognize the swimsuit even without a bathing lake.


